The key to professional home recordings isn’t eliminating noise, but mastering acoustic control through precise engineering techniques.
- Effective acoustic treatment relies on managing the micro-environment around the microphone, not soundproofing the entire room.
- Proper gain staging and subtractive EQ have a far greater impact on sound quality than expensive preamps or plugins.
Recommendation: Stop fighting your room and start applying targeted, resourceful techniques to manage reflections, vibrations, and signal integrity for clean, professional results.
For home studio owners in the UK, the dream of capturing the pristine tone of an acoustic guitar or the rich resonance of a violin is often shattered by reality. Traffic noise bleeding through the windows, the neighbour’s television vibrating through the floor, and the boxy sound of an untreated room can turn a recording session into a frustrating battle. The common advice is to invest in expensive soundproofing, a solution that’s often impractical and financially out of reach for most. Many fall back on generic tips like recording in a closet, only to find their recordings sound muffled and lifeless.
But what if the entire premise of « soundproofing » is a red herring? What if the secret to professional-sounding acoustic recordings at home doesn’t lie in building a silent bunker, but in intelligently managing the physics of sound within your existing space? This guide moves beyond the platitudes. It focuses on the principles of acoustic control and signal integrity that professional sound engineers use. It’s about being resourceful, precise, and understanding *why* certain techniques work.
Instead of fighting your room, you will learn to work with it, or even bypass it entirely. We will explore precise microphone placements that minimise reflections, DIY absorption methods that cost nothing, and gain staging disciplines that preserve the natural dynamics of your instrument. You will discover how to clean up recordings with surgical EQ, how to stop vibrations at their source, and even how to turn the limitations of your environment into a creative advantage. This is not about spending money; it’s about applying knowledge.
This article provides a detailed roadmap, guiding you through the essential engineering techniques to elevate your home recordings from amateur to professional. Let’s explore how to achieve sonic clarity and depth, regardless of your room’s imperfections.
Contents: Achieving Studio-Quality Sound in an Imperfect Room
- XY vs Spaced Pair: Which Mic Technique Fits Your Small Room?
- Duvets and Bookshelves: Creating a Vocal Booth for £0
- Red Lights: Why Recording Too Hot Ruins Your Acoustic Tone
- EQ Cuts vs Boosts: Cleaning Up Muddy Home Recordings
- Preamp Quality: Does a £100 Interface Kill Your Violin Sound?
- Tennis Ball Riser: Stopping Kick Drum Thud Through the Floor
- Mixing Wet and Dry Samples: Creating a Cohesive Room Sound
- How to Turn Kitchen Objects into Creative Sonic Art Using Sampling?
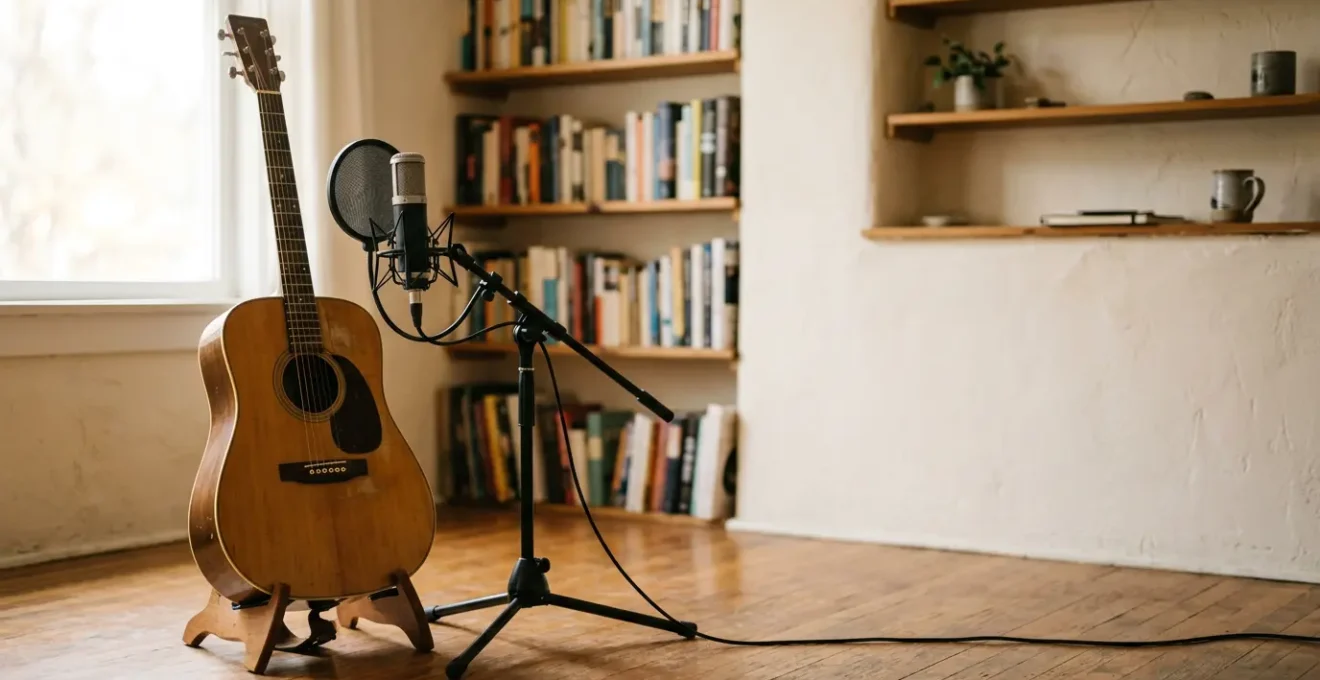
XY vs Spaced Pair: Which Mic Technique Fits Your Small Room?
Before you even think about acoustic treatment, your first line of defence against a poor-sounding room is microphone technique. The goal is to maximise the direct sound from the instrument while minimising the capture of unwanted room reflections. In a small, untreated space, stereo techniques are not all created equal. A « spaced pair » (two mics several feet apart) is excellent for capturing a wide, immersive soundstage in a great-sounding hall, but in a small bedroom, it will mostly capture problematic wall reflections and phase issues.
The solution is a coincident pair, such as the XY technique. This involves placing two cardioid microphone capsules as close together as possible, angled at 90 degrees. Because the sound arrives at both capsules at virtually the same time, this technique is highly mono-compatible and avoids the phase cancellation that plagues spaced pairs in small rooms. It captures a clear, focused stereo image without an exaggerated sense of a boomy, unflattering space. Your focus should be on creating a high-quality « mono » recording first, and XY is the safest way to get stereo width without compromising core quality.

The image above illustrates the precision required for stereo miking. While it shows a Mid-Side setup, the principle of close capsule alignment is shared with XY. For a basic XY setup, point the « V » shape towards the instrument, about 10-12 inches away. The result is a tight, phase-coherent sound that sits well in a mix and gives you a solid foundation to work with, effectively making your room’s negative characteristics less relevant. Mastering this technique is a fundamental step in acoustic control.
Duvets and Bookshelves: Creating a Vocal Booth for £0
Once your mic technique is optimised, the next step is to control the micro-environment around the microphone. Forget trying to treat your entire room; it’s inefficient and expensive. Instead, create a small, targeted « dead zone » where you’ll be recording. This is where household items become your most powerful tools for acoustic control. Heavy blankets, duvets, and full bookshelves are excellent at absorbing and diffusing high and mid-range frequencies, which are the primary cause of flutter echo and harsh reflections in home recordings.
The most effective method is building a « microphone fort. » Position mic stands, chairs, or anything you can find in a tight circle around the performer and microphone, then drape heavy duvets or blankets over them. This creates a 360-degree shield of absorption. If you don’t have stands, a bookshelf filled with irregularly-sized books placed behind the performer acts as a fantastic natural diffuser, scattering sound waves instead of letting them bounce flatly off the wall. Don’t underestimate the « Human Gobo » (go-between) technique: have a friend hold a thick duvet behind the microphone, facing the performer, to absorb reflections from the front.
The goal is to prevent sound waves from leaving the immediate area and returning to the microphone as coloured reflections. Research shows that strategic DIY acoustic treatment delivers significant improvements for a minimal budget. By focusing your efforts on the immediate 3-4 feet around the microphone, you can achieve a dry, clean, and professional-sounding recording that is free from the audible signature of a small, untreated room.
Red Lights: Why Recording Too Hot Ruins Your Acoustic Tone
A common mistake in home recording is the fear of recording too quietly. Pushing preamp gain until the meters are « in the red » seems like a good way to get a strong signal, but it’s one of the fastest ways to ruin an acoustic recording. Digital clipping (when the signal exceeds 0 dBFS) is harsh, unmusical, and irreversible. But even before you hit digital zero, pushing a budget-friendly preamp on a typical £100-£200 audio interface too hard introduces noise and distortion, compressing the natural dynamics of your performance.
The solution is disciplined gain staging. In the age of 24-bit recording, the noise floor is incredibly low. There is no need to record hot. The professional standard is to aim for peaks between -18 and -12 dBFS. In fact, many professional audio engineers recommend recording acoustic instruments at -12 to -14 dBFS to leave ample headroom. This preserves the transient detail—the delicate pick attack on a guitar or the initial scrape of a bow on a violin—which is the first thing to be destroyed by over-compression or clipping. A healthy, dynamic signal will look quieter on your DAW’s meters, and that’s okay. It means you’ve captured the performance naturally.
To set your levels correctly, play the loudest part of your song repeatedly and adjust the preamp gain until those peaks are hitting your target level. Keep your faders at unity (0 dB) during tracking. This discipline ensures you capture the instrument with maximum fidelity and dynamic range, giving you a clean, malleable recording that is a pleasure to mix, rather than a distorted, compressed file you have to fight with.
EQ Cuts vs Boosts: Cleaning Up Muddy Home Recordings
Even with good mic technique and DIY absorption, home recordings will inevitably capture some problematic room resonances, especially in the low-mid frequencies (200-500 Hz). This is what creates a « muddy, » « boomy, » or « boxy » sound. The amateur instinct is to start boosting frequencies with an EQ to make things sound « better »—adding highs for « air » or lows for « warmth. » However, the professional approach is almost always subtractive EQ: carving out problem frequencies rather than boosting pleasant ones.
Your first move should always be a high-pass filter. Frequencies below 80-100 Hz on an acoustic guitar or violin are often just inaudible rumble from traffic, footsteps, or your building’s HVAC system. Cutting them out instantly cleans up the recording and creates more headroom. Next, you need to find and remove your room’s specific resonant frequencies. The « boost and sweep » technique is perfect for this. Insert an EQ plugin, create a narrow bell curve with a high gain boost, and slowly sweep it across the 100 Hz to 1000 Hz range. You will hear certain frequencies jump out and sound overwhelmingly loud or unpleasant. Once you’ve identified a problem spot, simply flip the boost to a cut of 2-4 dB.

This surgical removal cleans up the mud without affecting the core tone of the instrument. It’s like performing sonic housekeeping. By removing what is wrong, you reveal what is right. This subtractive mindset is a cornerstone of professional mixing and is far more effective than trying to add frequencies that weren’t captured well in the first place.
Action Plan: Auditing and Cleaning Your Acoustic Recordings
- Source Analysis: Listen to the raw recording. Identify the main issues: is it boomy, harsh, or just noisy? Note the character of the unwanted sounds.
- High-Pass Filter: Apply a high-pass filter as the first step. Start around 80 Hz for guitar and 100 Hz for violin and adjust by ear to remove rumble without thinning the sound.
- Subtractive EQ Sweep: Use the « boost and sweep » method to find and cut 2-3 specific muddy or resonant frequencies, typically between 200 Hz and 800 Hz.
- Noise Reduction: If background noise (hiss, fan) is consistent, use a dedicated noise reduction plugin sparingly. Capture a noise profile and apply only 3-6 dB of reduction to avoid artifacts.
- A/B Comparison: Constantly toggle the EQ and noise reduction on and off to ensure your changes are an improvement and haven’t damaged the core tone of the instrument.
Preamp Quality: Does a £100 Interface Kill Your Violin Sound?
The pursuit of better sound quality often leads home studio owners down a rabbit hole of expensive gear. A common belief is that the preamps in affordable audio interfaces (in the £100-£200 range) are the weak link, and that upgrading to a high-end external preamp is the only way to get a professional sound. While premium preamps do offer a subtle character and lower noise at very high gain, their impact is vastly overestimated in the context of an untreated home studio.
As a widely accepted principle in the audio community states, the room’s acoustics and microphone placement have a far greater impact on the final sound than the preamp. In a home environment, the difference between a £100 interface preamp and a £1000 standalone unit will be completely masked by room reflections, poor mic choice, and incorrect gain staging. The preamps in modern entry-level interfaces from reputable brands are remarkably clean and transparent. They are more than capable of capturing a professional-quality recording, provided you give them a clean, well-managed signal.
In an untreated room, the room’s acoustics and the microphone placement have a 100x greater impact on the final sound than the preamp.
– Audio engineering consensus, as cited in Home Studio Recording Principles
Instead of lusting after new gear, focus on maximising what you have. Ensure you’re using the correct input (Mic, not Line/Instrument), enable phantom power for condenser mics, and above all, adhere to proper gain staging. Hitting the preamp’s sweet spot (around -12 dBFS peaks) will yield better results than pushing it into its noisy, stressed upper limits. Your money and effort are far better spent on a decent microphone, some heavy blankets, and learning the techniques in this guide.
Tennis Ball Riser: Stopping Kick Drum Thud Through the Floor
While this article focuses on melodic acoustic instruments, the principle of stopping vibrations is universally applicable and crucial for home studios in flats or terraced houses. Low-frequency energy doesn’t just travel through the air; it travels through structures. This is known as mechanical decoupling, and it’s your most powerful tool against bothering neighbours or capturing floor vibrations in your recordings. A kick drum is the classic example, but the same physics apply to a tapping foot, a cello endpin, or an acoustic guitar amplifier placed on a wooden floor.
The « tennis ball riser » is a famous DIY solution for drummers, where a platform is built to rest on halved tennis balls, which act as shock absorbers. You can apply this same principle on a smaller scale. Placing your microphone stand on a dense piece of foam or a dedicated isolation pad prevents vibrations from your foot tapping from travelling up the stand and into the microphone. A cello or upright bass endpin resting on a small foam block will stop the entire floor from becoming a giant, boomy resonator that muddies your recording.
This concept of decoupling is a form of acoustic control that has nothing to do with airborne sound. It’s about breaking the physical connection between a sound source (or a musician’s movement) and a large, resonant surface like the floor or a desk. For anyone recording in a typical UK home, where floorboards are common and neighbours are close, mastering mechanical decoupling is just as important as managing airborne reflections. It is a practical, targeted solution to a very common structural noise problem.
Key Takeaways
- Mastering acoustic control (managing reflections and vibrations) is more effective and affordable than attempting full soundproofing.
- Your recording technique, from mic placement to gain staging, has a greater impact on sound quality than the price of your equipment.
- Adopt a subtractive mindset: solve problems by removing unwanted frequencies and noise rather than boosting desirable ones.
Mixing Wet and Dry Samples: Creating a Cohesive Room Sound
What if, after all your efforts, your room is simply too noisy or acoustically hostile for a clean take? In this case, the best strategy is not to fight the room, but to remove it from the equation entirely during recording and add it back in artificially during the mix. This gives you complete control over the final sound, a luxury you don’t have when you’re stuck with the sound of a bad room printed into your recording.
To do this, record your instrument as « dry » as possible. This means using a close-mic technique (as close as 10-12 inches, depending on the instrument) and surrounding the microphone with as much absorption (your duvet fort) as you can. The goal is to capture only the direct sound of the instrument, with minimal room tone. The resulting recording might sound sterile and claustrophobic on its own, but it’s a perfect blank slate.
In your DAW, you can now use a convolution reverb plugin. These plugins use Impulse Responses (IRs)—digital snapshots of real-world spaces—to place your dry recording in a virtual environment. You can make your home-recorded violin sound like it was played in a concert hall or your acoustic guitar in a famous studio. By adjusting the pre-delay (the time between the direct sound and the first reflections) and the wet/dry mix, you can dial in the exact amount of space and ambience you want. This technique, used by countless professionals, offers ultimate flexibility and is a powerful way to turn the disadvantage of a bad room into an advantage of total creative control.
How to Turn Kitchen Objects into Creative Sonic Art Using Sampling?
Sometimes, the ambient noise in a home environment is simply too high for a delicate acoustic performance. When street noise, family members, or plumbing make a clean take impossible, don’t admit defeat—pivot creatively. This is the perfect opportunity to explore the world of found sound and sampling, turning everyday objects into a unique percussive toolkit. Rhythmic and percussive sounds are far less affected by ambient noise than melodic ones, and can add incredible texture to a track.
Your kitchen is a goldmine. A pepper grinder becomes a shaker, two spoons clanked together become claves, and a large, empty water jug tapped with your fingers can provide a surprisingly deep kick drum sound. The key to capturing these sounds cleanly, regardless of background noise, is a contact microphone (also known as a piezo pickup). These inexpensive mics capture vibrations directly from a surface, completely ignoring airborne sound. You can tape one to a metal pot, a wooden cutting board, or a glass, and record only the sound of that object being struck or scraped.
Build a structured percussion kit by recording each found sound as a separate, clean sample. Load these into your DAW or a sampler, and you can program rhythms that are entirely your own. This approach transforms a recording challenge into a creative opportunity. It embraces a resourceful, problem-solving mindset that is the very essence of a great engineer. Instead of a failed acoustic guitar take, you might end up with a unique, compelling rhythm track that nobody else has.
By shifting your focus from expensive soundproofing to intelligent acoustic control, you can consistently produce clean, dynamic, and professional-sounding recordings of acoustic instruments in any room. The next logical step is to apply these engineering principles to your own space and equipment.