
In summary:
- The key to silent practice isn’t just reducing volume, but separating airborne sound (cymbals) from structure-borne vibration (kick drum).
- A DIY tennis ball riser is the single most effective tool to stop kick drum thud travelling through the floor to your neighbours.
- Mesh heads and low-volume cymbals drastically cut airborne noise, but require technique adjustments to maximise their benefit.
- Protecting your hearing with high-fidelity earplugs and focusing on ergonomics are crucial, even with a quiet setup.
The familiar dread. You’re deep in a groove, the pattern is finally locking in, and then you hear it: the faint, rhythmic thumping on the adjoining wall. Or worse, the knock at the door. For any drummer living in a terraced house, maisonette, or flat, the dream of daily practice is constantly at war with the nightmare of noise complaints. The common advice is often impractical or incredibly expensive: « just buy an electronic kit » (losing the feel of an acoustic set) or « soundproof the room » (a four-figure fantasy for most).
This approach misses the point. The real enemy isn’t just volume. It’s physics. The high-frequency crack of a snare or the wash of a cymbal are airborne sounds, relatively easy to absorb with soft furnishings. But the low-frequency thud of your kick drum is a structure-borne vibration, a seismic event that travels directly through the floorboards and joists into your neighbour’s living room. The true art of silent practice is not about being quiet, but about being clever.
But what if the solution wasn’t brute force, but scientific stealth? What if, instead of trying to build a fortress, you could learn to acoustically decouple your kit from the building itself? This guide is your manual for becoming a stealth drummer. We will break down the science of sound transmission and provide a series of targeted, often low-cost hacks that address the specific acoustic problems of a shared-wall home. This is about turning your practice space from a source of conflict into a silent laboratory for technical mastery.
This article provides a detailed roadmap to achieve near-silent practice. We’ll explore everything from DIY acoustic treatment and low-volume gear to the crucial, often-overlooked, ergonomic and hearing-protection strategies that make practice sustainable.
Summary: How to Practice Drums in a Terraced House Without Eviction?
- Duvets and Bookshelves: Creating a Vocal Booth for £0
- Silent Stroke Heads: Do They Ruin Your Stick Rebound?
- L80 vs Gen16:How Hip-Hop Became a Global Cultural Movement for Youth Identity?
- Tennis Ball Riser: Stopping Kick Drum Thud Through the Floor
- Rubber vs Mesh Pads: Is the upgrade Worth It for Technique?
- Sticking Patterns on the Sofa: Developing Hands While Watching TV
- High-Fidelity Earplugs: Saving Your Ears Without Muffling the Sound
- Ergonomic Accessories: Playing Without Pain
Duvets and Bookshelves: Creating a Vocal Booth for £0
Before tackling the earth-shaking problem of your kick drum, let’s start with the low-hanging fruit: airborne sound. This is the sharp, high-frequency sound of your snare, cymbals, and hi-hats that bounces around your room. In a small, hard-surfaced room (think box room with plasterboard walls), these reflections create a harsh, clattery sound that easily leaks through doors and windows. Your first mission is to tame these reflections using items you already own.
The principle is simple: add absorption and mass. Absorption tackles high frequencies, while mass helps block sound transmission. A thick duvet or a spare mattress propped up in a corner or hung over a door is an incredibly effective broadband absorber. It soaks up those harsh reflections, making the room sound ‘deader’ and less boomy. Bookshelves, especially when packed tightly with books of varying sizes, act as both absorbers and diffusers (scattering sound waves) and, crucially, add significant mass to a flimsy wall. This combination reduces the amount of sound energy bouncing around inside the room, which in turn means less energy trying to escape it.

This is precisely the strategy that studio engineers use, just on a DIY budget. As Paul White, the esteemed Editor In Chief at Sound On Sound, explains, there’s a clear division of labour in this approach. By strategically placing these everyday items, you can create a surprisingly effective practice environment for £0.
Duvets provide absorption (taming high-frequency reflections inside the room, like cymbal wash), while bookshelves provide mass (which helps, minimally, with isolation).
– Paul White, SOS Editor In Chief, Sound On Sound – Drum Kit Isolation Q&A
Silent Stroke Heads: Do They Ruin Your Stick Rebound?
Once you’ve treated your room, the next step is to reduce the sound at its source. Silent stroke or mesh heads are a game-changer, replacing your standard Mylar heads with a woven mesh that produces a quiet, low-frequency ‘thump’ instead of a resonant boom. A common fear among drummers is that the bouncier, trampoline-like feel will « ruin » their technique and make it harder to transition back to a real kit. This is a myth, provided you approach them correctly.
The key is to view mesh heads not as a compromise, but as a diagnostic tool. Their unique response forces you to refine your control. Ghost notes, for example, require more precision, as the lower volume floor of the head makes inconsistencies more apparent. The increased rebound can be an asset for practicing intricate patterns and press rolls, but it demands a lighter touch. You can’t rely on brute force; you have to use finesse. By tuning them to a medium-tight tension, you can find a happy medium that feels responsive without being absurdly bouncy.
Rather than ruining your rebound, they recalibrate it. They teach you to control your dynamics and clean up your sticking in a way a loud kit often masks. Alternating practice sessions between mesh heads and a standard practice pad or acoustic kit helps your muscle memory stay versatile, ensuring you can adapt to any playing surface.
Your Action Plan: Technique Drills for Mesh Heads
- Install mesh heads and tune them to medium-tight tension to optimize stick rebound for ghost notes and press rolls.
- Practice low-volume ghost notes at 60-80 BPM, focusing on control rather than speed—mesh heads amplify technique flaws.
- Work on cross-stick patterns and rimshots to explore the timbral range mesh heads offer beyond standard strokes.
- Alternate weekly practice sessions between mesh and Mylar heads to maintain muscle memory calibration for both surfaces.
- Use a metronome app to practice dynamic range exercises, moving from pp (pianissimo) to ff (fortissimo) to exploit the mesh head’s articulation sensitivity.
L80 vs Gen16:How Hip-Hop Became a Global Cultural Movement for Youth Identity?
Mesh heads solve the drum problem, but what about the cymbals? The high-frequency ‘chink’ and ‘tshhh’ of metal is often the most piercing part of a drum kit’s sound. Zildjian, a leader in the field, offers two distinct solutions that represent two different philosophies of quiet practice: the L80 Low Volume series and the Gen16 series.
The L80 cymbals are the « acoustic purist » choice. They are real metal cymbals, but perforated with thousands of tiny holes. This design drastically reduces the mass and ability of the cymbal to sustain, resulting in a volume reduction of up to 80% while retaining a remarkably authentic feel and tone, just at a much lower level. They are a one-time purchase: you buy them, put them on your kit, and play. They’re perfect for lessons, low-volume gigs, and pure, unadulterated quiet practice.
The Gen16 system, on the other hand, is for the « hybrid explorer. » These cymbals are also perforated but are designed to work with a dedicated electronic module. They are essentially triggers, capturing your performance and allowing you to blend the quiet acoustic sound with processed sounds from the module. This opens up a world of sonic possibility, allowing you to shape your cymbal sound, record directly, and play along with backing tracks seamlessly. It’s a more complex and potentially more expensive system, but offers unparalleled flexibility. The choice between them depends entirely on your goals: do you want a pure, quiet acoustic experience, or a flexible hybrid setup?
As the following comparison shows, the decision is less about which is « better » and more about which aligns with your practice needs and budget. A recent analysis breaks down the cost and features, highlighting the trade-offs between the two systems.
| Feature | Zildjian L80 | Zildjian Gen16 |
|---|---|---|
| Philosophy | Acoustic Purist | Hybrid Explorer |
| Volume Level (acoustic) | Quieter (matte finish) | Slightly louder (buffed bronze) |
| Initial Cost | $299.90 (set pack) | $149.90+ (cymbal) + module/cables |
| Electronic Module | No | Yes (DCP module for sound shaping) |
| Best For | Pure practice, drum lessons, low-volume gigs | Recording, blending with backing tracks, sonic flexibility |
| Feel | Real metal cymbal response | Real metal + digital sound options |
| Total Cost of Ownership | One-time purchase | Higher (module, cables, software potential) |
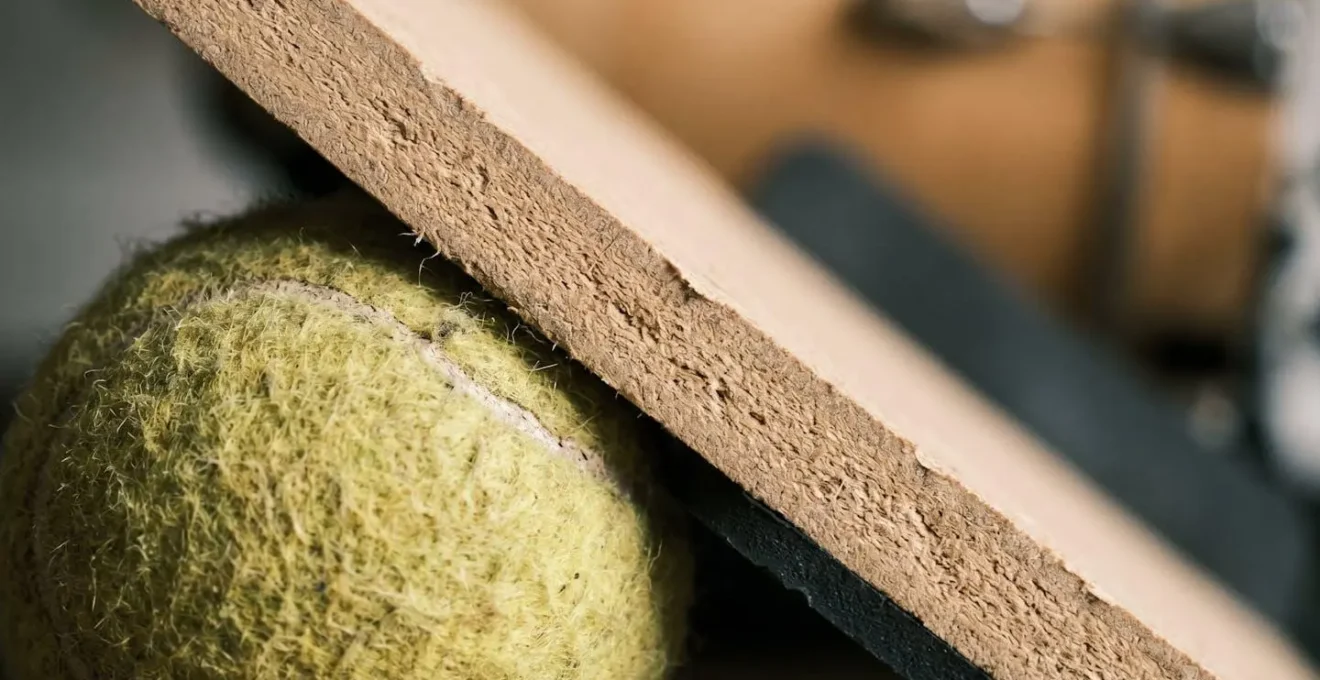
Tennis Ball Riser: Stopping Kick Drum Thud Through the Floor
This is the secret weapon. Mesh heads and L80s solve the airborne sound problem, but they do nothing to stop the structure-borne vibration from your kick drum pedal and beater. Every time you hit that kick, you’re sending a low-frequency shockwave directly into the floor. This is the thud your neighbours feel more than hear, and it’s the number one cause of complaints. The solution is to acoustically decouple the kit from the floor using a DIY tennis ball riser.
The concept is brilliant in its simplicity. You create a « floating floor » for your drum kit by sandwiching a layer of tennis balls between two sheets of MDF or plywood. The tennis balls act as shock absorbers, creating an « acoustic impedance mismatch. » The vibration from the drum has to travel from the wood, through the air inside the ball, through the felt, back to the wood, and then to the floor. At each stage of this journey, energy is lost, and the vibration is effectively neutralised before it can enter the building’s structure. It’s the single most effective thing you can do to silence your kick drum.
Building one can be a simple weekend project, but for maximum effectiveness, you need to think in layers. A basic riser with just MDF and tennis balls will work well, but adding layers of high-density foam or a heavy rubber stall mat on top will absorb an even wider range of frequencies. The ultimate goal is to ensure no part of the riser, drum kit, or your throne is touching the floor or walls directly. This creates a completely isolated platform, stopping those vibrations dead in their tracks.
Your Action Plan: Building a DIY Drum Riser
- Good: Build a simple tennis ball riser using two 3/4-inch MDF sheets (4×5 ft) with 25 tennis balls sandwiched between drilled 2-inch holes—reduces kick thud significantly.
- Better: Add multiple isolation layers: MDF base, high-density foam strips (or Rockwool slabs), tennis balls, then top MDF layer plus thick rubber stall mat to absorb wider frequency range.
- Best: Construct a full floating floor concept using Regufoam 150 or Sylomer blocks between layered MDF, ensuring the skirt never touches walls or floor to prevent vibration short-circuits, and include throne placement on the platform for total isolation.
- Testing: Use the ‘Water Glass Test’—place a glass of water on the floor in an adjacent room and observe ripple reduction before/after riser installation.
- Advanced Testing: Download a smartphone accelerometer app to measure structure-borne vibration levels (in Hz or dB) before and after to quantify effectiveness.
Rubber vs Mesh Pads: Is the upgrade Worth It for Technique?
Even with a quieted-down kit, there will be times when you need to practice away from the full setup. This is where the humble practice pad comes in, but not all pads are created equal. The choice between a classic hard rubber pad and a modern tunable mesh pad isn’t just about noise level; it’s a crucial decision for your technical development and physical health.
Hard rubber pads offer great rebound, making them fantastic for working on speed and rudimental patterns. However, that high rebound comes from a very hard surface, which can be unforgiving. The high impact can lead to wrist fatigue and, in a worst-case scenario, contribute to repetitive strain injuries over long, intense practice sessions. Soft rubber or neoprene pads are quieter and more absorbent, offering a more wrist-friendly experience that helps build muscle due to the lower rebound.
This is where mesh pads truly shine as an upgrade. They offer the best of both worlds: a tunable rebound that can mimic everything from a tight marching snare to a loose floor tom, and a surface that is exceptionally quiet and low-impact. The superior shock absorption of a mesh surface is a game-changer for injury prevention, allowing for longer and more productive sessions without joint stress. For drummers experiencing any wrist strain, the upgrade isn’t a luxury; it’s a necessity.
Case Study: The Impact of Mesh Pads on Practice Sustainability
A professional drummer documented their transition from hard rubber practice pads to mesh heads after experiencing wrist strain during extended practice sessions. By switching to a Sabian Quiet Tone mesh pad with adjustable tension, they reported a 70% reduction in wrist fatigue over three-hour practice blocks while maintaining technique development. The mesh surface’s superior shock absorption allowed for longer, more productive sessions without joint stress, demonstrating that pad choice directly impacts injury prevention and practice sustainability.
| Pad Type | Rebound Velocity (1-10) | Articulation/Nuance (1-10) | Acoustic Noise (1-10) | Ergonomics/Wrist Impact |
|---|---|---|---|---|
| Hard Rubber (Gum Rubber) | 8 | 7 | 6 | High impact—fatiguing for long sessions |
| Soft Rubber (Neoprene) | 4 | 5 | 3 | Low impact—muscle building, wrist-friendly |
| Mesh Head (Tunable) | 7 | 9 | 2 | Very low impact—excellent for injury prevention |
| Silicone (Ultra-Portable) | 3 | 4 | 1 | Very low impact—travel practice only |
| Dual-Layer Mesh | 6 | 8 | 2 | Low impact—best for realistic feel + safety |
Sticking Patterns on the Sofa: Developing Hands While Watching TV
The ultimate form of quiet practice requires no specialised equipment at all. Some of the most valuable development time can happen on the sofa, in front of the TV, with just a pair of sticks and your hands. The classic image of a drummer mindlessly tapping on a pillow has some merit, but without structure, it can reinforce bad habits. The key is to transform this distracted downtime into focused, intentional practice.
This means using your environment with purpose. A pillow provides zero rebound, forcing your wrists and fingers to do all the work of lifting the stick. This is an incredible workout for building control and endurance. A stack of magazines or a thick book offers a harder, higher-rebound surface, better for working on speed and rudimental clarity. Your own thighs are a fantastic surface for calibrating an even touch between your hands, as you get instant physical feedback if one hand is hitting harder than the other.
The most advanced form of this practice is « air drumming » with intent. Don’t just flail your arms. Visualise the kit in front of you. Mentally hear (or « audiate ») the sticking patterns. Transcribe the drum beat from the TV show’s theme tune. This mental practice builds your internal clock, your musical imagination, and your coordination in a way that physical practice alone cannot. It connects your mind directly to your hands, turning passive viewing into active musical development.
Your Action Plan: Focused Sofa Drumming Framework
- Set a metronome app to 60-80 BPM and choose one specific rudiment (single paradiddle, double stroke roll) to practice during TV commercial breaks only.
- Use varied surfaces for targeted development—phone book or magazine stack for higher rebound (speed), pillow for zero rebound (muscle building), your own thighs for even-touch calibration between hands.
- Practice ‘air drumming’ with intent during show segments—visualize orchestrating fills, audiate (mentally hear) sticking patterns without physical movement to develop internal timing.
- Limit distracted practice to 20-minute focused intervals, then rest—avoid mindless hitting which can reinforce bad habits and reduce technique gains.
- Actively listen to the TV soundtrack for drumming ideas—identify ghost notes in theme songs, analyze beat structures in commercials, mentally map drum parts to practice later.
High-Fidelity Earplugs: Saving Your Ears Without Muffling the Sound
This might seem counter-intuitive: why wear ear protection when the whole point is to be quiet? The answer is about protecting your most valuable musical asset—your hearing—from a different kind of danger. While a quiet kit with mesh heads and L80s won’t produce the deafening roar of a full acoustic kit, it still generates sharp, high-frequency transients. The ‘chink’ of a stick on a low-volume cymbal or the ‘tap’ on a mesh head, repeated thousands of times over a two-hour practice session, constitutes a significant cumulative exposure that can lead to tinnitus and hearing loss over time.
Standard foam earplugs are not the answer. They muffle sound by cutting high frequencies more than low frequencies, leaving you with a boomy, unclear mess that makes it impossible to hear the nuance in your playing. High-fidelity earplugs are different. They contain special acoustic filters designed to reduce the overall volume evenly across the entire frequency spectrum. The effect is like turning down a volume knob, not like sticking cotton wool in your ears. You hear everything—the tone of your drums, the pitch of your cymbals, your bandmates’ conversation—just at a safer level.
These filters are often interchangeable. You might use a lower-attenuation filter (-9dB or -15dB) for home practice, preserving maximum clarity while taking the dangerous edge off. For a loud band rehearsal, you can swap to a higher-attenuation filter (-20dB or -25dB) for more protection. For those truly serious about their hearing, custom-moulded earplugs are the ultimate investment. Made from an impression of your ear canal taken by an audiologist, they offer a perfect, comfortable fit and the most accurate sound reduction available.
Your Action Plan: Choosing and Using Hearing Protection
- Even with quiet setups (mesh heads, L80 cymbals), wear high-fidelity earplugs to protect against cumulative exposure to sharp, high-frequency cymbal ‘chink’ sounds repeated thousands of times.
- For home practice, use lower-attenuation filters (-9dB to -15dB) to preserve clarity and frequency balance while reducing harmful peak levels.
- For loud band rehearsals or live performances, switch to higher-attenuation filters (-20dB to -25dB) to protect hearing while maintaining communication ability.
- Consider custom-molded earplugs as a long-term investment—detail the process: audiologist ear impression, lab fabrication, interchangeable filter system, typical cost £150-£300, lifespan 4-7 years.
- Frame custom molds as protecting your most important musical tool (hearing)—calculate cost per practice hour over lifespan to justify investment versus disposable plugs.
Key Takeaways
- The biggest enemy is structure-borne vibration, not airborne volume. A DIY tennis ball riser is your most powerful weapon to decouple your kit from the floor.
- Mesh heads and low-volume cymbals are effective tools, but they require you to adapt your technique and can serve as excellent diagnostic aids for your playing.
- Even in a « quiet » setup, cumulative exposure to high-frequency transients is a risk. High-fidelity earplugs protect your hearing without sacrificing sonic clarity.
Ergonomic Accessories: Playing Without Pain
You’ve built the riser, installed the mesh heads, and bought the earplugs. Your setup is silent and your neighbours are happy. But a new problem can emerge: the ergonomic trap. Quiet setups, practice pads, and electronic kits often have different dimensions, angles, and rebound characteristics than a full acoustic kit. If you’re not careful, your body will contort itself to adapt, leading to new strains in your back, wrists, and shoulders. Playing without noise complaints is great, but playing without pain is essential.
The foundation of good ergonomics is your throne. Your throne height dictates the entire posture of your body. Sit with your feet flat on the floor (or pedals), with your thighs sloping slightly downwards. This opens up your hips and engages your core, taking strain off your lower back. A saddle-style throne can offer better spinal alignment than a traditional round one for many players. Just as importantly, you must be vigilant about the placement of your pads and cymbals. Ensure they are positioned where your acoustic kit components would be, maintaining consistent muscle memory and avoiding awkward reaching.
Finally, treat your practice session like any other athletic activity. A proper warm-up prepares your muscles and tendons for the work ahead, while a cool-down helps prevent stiffness and injury. Simple wrist circles, finger stretches, and shoulder rolls can make a world of difference. This holistic approach—combining a well-adjusted setup with physical preparation—is the key to ensuring your silent practice journey is a long, healthy, and productive one.
Your Action Plan: Pre and Post-Practice Ergonomic Routine
- Pre-Practice Warm-Up (5 minutes): Wrist circles (10 reps each direction), finger stretches (extend and flex each finger individually), forearm rotation (palms up/down, 15 reps), shoulder rolls (10 forward, 10 backward), neck side-to-side stretches.
- Posture Check: Throne height adjustment—sit with feet flat, knees at 90-100 degrees, thighs slightly downward sloping to free up hip flexors and reduce lower back strain.
- Throne Type Comparison: Round thrones (traditional, 360-degree rotation) vs Saddle thrones (better spinal alignment, reduced pressure points); Spindle height adjustment (budget-friendly) vs Hydraulic (smoother, more stable, preferred for longer sessions).
- Post-Practice Cool-Down (5 minutes): Gentle wrist flexor/extensor stretches (hold 20-30 seconds each), finger tendon glides, forearm self-massage, shoulder blade squeezes to counteract forward-hunched posture.
- Quiet Setup Ergonomic Trap: E-kits and practice pads often have different dimensions/rebound than acoustic kits—create a checklist to re-evaluate setup ergonomics monthly, ensuring pad height, angle, and throne position don’t create new strain patterns.
Start applying these stealth techniques today. Go beyond simply being quiet and embrace the science of decoupling. Transform your practice from a source of anxiety into your most powerful tool for growth, all without a single knock on the door.