The greatest myth in music is that a better instrument creates a better musician; the reality is that your ears and internal sense of time are your true instruments.
- Expensive gear cannot fix poor pitch perception or an unsteady internal clock.
- Tuners and metronomes are not helpers; they are diagnostic tools for calibrating your brain’s ability to hear and feel music accurately.
Recommendation: Stop chasing better gear and start the disciplined work of training your perception with these essential tools. That is the only path to true musicianship.
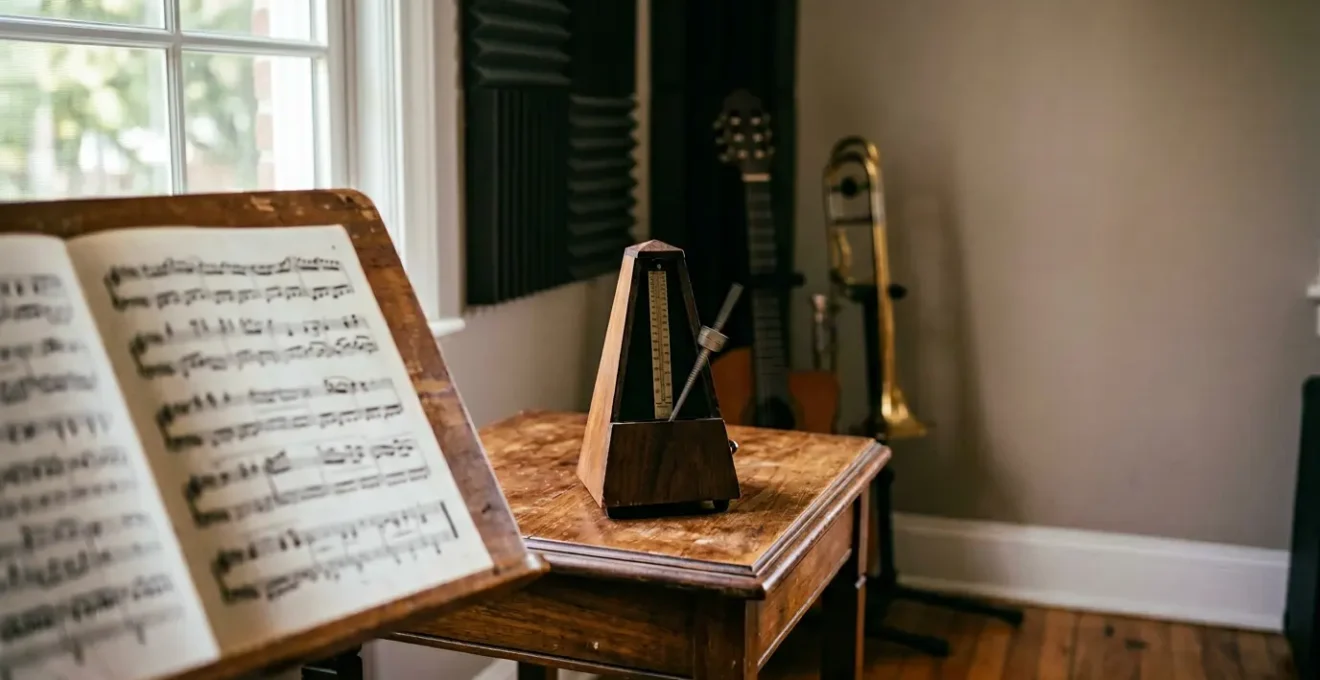
You’ve spent hundreds, perhaps thousands, on your instrument. You practice the chords, the scales, the songs. Yet, when you listen back to a recording, something is off. It sounds amateurish, weak, and unconvincing. The common, expensive advice is to upgrade your gear: a better guitar, a vintage amplifier, a pricier piano. This is a fundamental misunderstanding of what makes music sound good. The problem isn’t the wooden and metal object in your hands; the problem is the perception and timing inside your head. Your instrument doesn’t play music; you do.
The truth is that a musician’s most vital assets are their ears and their internal clock. No amount of money spent on gear can compensate for a lack of pitch sensitivity or a weak sense of rhythm. This is where the two most underrated, and often skipped, tools in music come into play: the tuner and the metronome. They are not mere accessories. They are non-negotiable, foundational training equipment for your brain. They provide the objective, cold, hard truth that your subjective mind often filters out. They are the mirror that shows you what you *actually* sound like, not what you *think* you sound like.
But what if the real key to unlocking your potential isn’t in the next gear purchase, but in the rigorous, disciplined use of these simple devices? This guide will dismantle the gear-first mentality and reposition the tuner and metronome as the central pillars of effective practice. We will explore how to use them not as crutches, but as powerful tools for perceptual calibration, transforming your ear into a precision instrument and your inner pulse into an unwavering source of groove. The real work begins here.
This article provides a complete framework for mastering these foundational tools. From understanding the technology to implementing advanced exercises, each section is designed to build your core musical skills from the ground up.
Summary: The True Instruments in a Musician’s Toolkit
- Vibration vs. Microphone: Which Tuner Works in a Noisy Room?
- Making the Click Fun: Disappearing Beat Exercises
- Just Tuning the Open Strings? Why Fretted Notes Might Be Out
- Eighth Notes on the Click: Learning to Play « In the Pocket »
- Tuning by Ear Against a Drone: Developing Pitch Sensitivity
- The Mirror of Truth: Using Your Phone to Hear Reality
- 432Hz Conspiracy: Should You Tune Lower for « Vibes »?
- Why You Can’t Play in Tune If You Don’t Know How to Listen
Vibration vs. Microphone: Which Tuner Works in a Noisy Room?
A beginner’s first mistake is assuming all tuners are created equal. The most common type, a microphone-based tuner (like those in smartphone apps), works by listening for an acoustic sound wave. This is perfectly adequate in a silent room. However, the moment you are in a rehearsal space with a drummer, at a noisy jam session, or even practicing with a backing track, a microphone tuner becomes effectively useless. It cannot distinguish the sound of your instrument from the ambient noise, leading to erratic readings or a complete failure to register a note. This is a practical limitation, not a sign of a « bad » app.
The professional solution is a vibration-based (piezo) tuner, often in a clip-on format. This type of tuner bypasses the air entirely. It clips onto your instrument’s headstock or body and detects the physical vibrations traveling through the wood as you play a note. Because it doesn’t have a microphone, it is almost completely immune to ambient noise, making it the non-negotiable standard for group settings and live performance. It measures the direct output of your instrument, providing an accurate, stable reading no matter how loud the room is.
Case Study: The Physics of Vibration on Different Instruments
The effectiveness of a vibration tuner is directly tied to an instrument’s construction. On a large, resonant body like an upright bass, a clip-on tuner works exceptionally well because the wood itself acts as a massive amplifier for the string’s vibrations. Conversely, users often report that the same tuner struggles on a solid-body electric bass. The dense, non-resonant body dampens vibrations quickly, sometimes requiring multiple forceful plucks for the tuner to register a pitch. Semi-hollow instruments fall somewhere in the middle. This demonstrates a crucial lesson: your tool must match the physics of your instrument. For solid-body electrics, a pedal tuner or a direct cable-in tuner that reads the electronic signal is often a more reliable choice than a clip-on.
Choosing the right tuner isn’t about preference; it’s about understanding the context in which you’ll be playing. A phone app is a convenient reference in isolation, but a vibration or direct-input tuner is a professional necessity for any musician who plans to play with others.
Making the Click Fun: Disappearing Beat Exercises
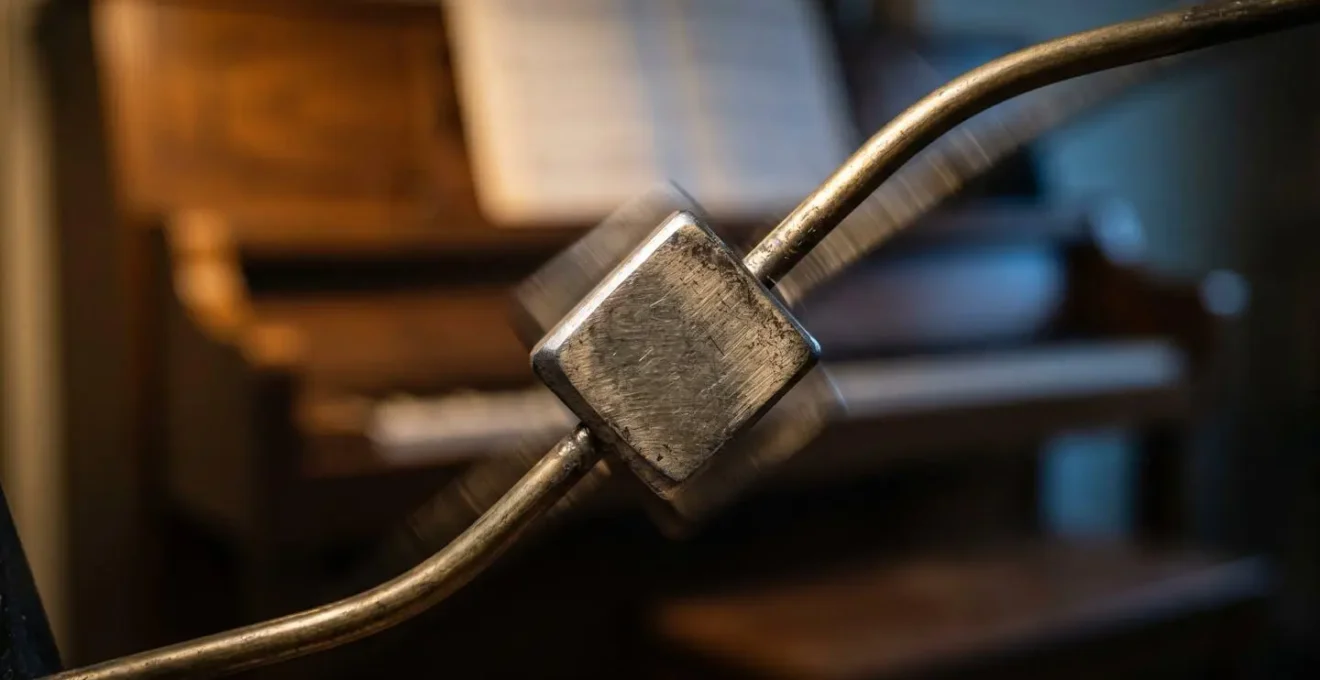
Let’s be clear: the metronome is not a toy, and its purpose is not « fun. » It is a discipline tool. The common complaint that practicing with a metronome makes your playing « robotic » comes from a complete misunderstanding of its function. You are not meant to sound *like* the metronome. You are meant to internalize its pulse so deeply that it becomes your own unwavering internal clock. When you can play perfectly without the click, you have succeeded. The click is the scaffolding; your groove is the building.
The most effective way to build this internal clock is not by endlessly playing scales to a constant beat, but by systematically removing the training wheels. This forces your brain to take responsibility for keeping time. The « disappearing beat » exercise is a fundamental method for achieving this.
As the image suggests, this level of practice requires deep concentration. It is an active mental exercise, not a passive physical one. You are training your neurological sense of rhythm. The goal is to make the pulse feel as natural and automatic as your own heartbeat.
- Step 1: Establish the Foundation. Set your metronome to a comfortable tempo (e.g., 80 BPM) with the click on every quarter note. Play a simple pattern for several bars until you are perfectly locked in.
- Step 2: The First Drop. Set the metronome to half the speed (40 BPM), so it only clicks on beats 1 and 3. Continue playing your pattern at the original 80 BPM tempo. You are now responsible for generating beats 2 and 4 with precision. Your goal is to make them land so perfectly that you can’t tell they are unclicked.
- Step 3: The Final Challenge. Set the metronome to a quarter of the speed (20 BPM), so it only clicks on beat 1 of every measure. You are now responsible for the other three beats. This is an immense challenge to your internal pulse and reveals any tendency to rush or drag.
- Step 4: The Real-World Application. Use a programmable metronome app to have the click disappear for entire measures or sections of a song. For example, have it play for the first two bars of a four-bar phrase and then go silent for the next two. When the click returns, are you still perfectly in time?
This is not a game. This is how you develop a professional, unshakable sense of time that will serve you in every musical situation for the rest of your life.
Just Tuning the Open Strings? Why Fretted Notes Might Be Out
A beginner tunes their open strings. An intermediate musician understands that this is only the first step. Getting your open strings to pitch ensures the instrument is ready to be played, but it does not guarantee that it will play *in tune* across the entire neck. The phenomenon you’re fighting is called intonation. Perfect intonation means that a note played at the 12th fret is a perfect octave of the open string. If it’s sharp or flat, your instrument’s intonation is off, and chords played up the neck will sound sour and dissonant, no matter how perfectly you tuned the open strings.
Fixing intonation is a mechanical adjustment made at the bridge of the instrument, where you change the effective length of each string. While it may sound complex, it’s a diagnostic health check that every serious musician must know how to perform. It is the difference between an instrument that only sounds good in the open position and one that is musically viable across its entire range. You cannot compensate for bad intonation with your fingers; it must be fixed at the source.
Your Intonation Diagnostic Checklist
- Reference Pitch: Play the harmonic at the 12th fret of one string. Let it ring and check its pitch with your most accurate tuner. This is your « true » octave.
- Fretted Pitch: Now, press the same string down firmly at the 12th fret and play the note. Check this fretted note’s pitch with the tuner.
- Compare and Diagnose: Compare the harmonic and the fretted note. If the fretted note is sharp, the string is effectively too short; you must move the saddle at the bridge *away* from the neck. If it is flat, the string is too long; you must move the saddle *closer* to the neck.
- Adjust and Re-Tune: Make a small adjustment to the saddle (e.g., a quarter turn of the screw). Crucially, you must then re-tune the open string back to its correct pitch before checking the 12th fret again.
- Repeat Until Perfect: Repeat this process of adjusting, re-tuning, and re-checking until the 12th-fret harmonic and the 12th-fret fretted note are identical. Then, repeat for all six strings.
Even after this meticulous process, you must accept a hard truth about standard fretted instruments. As experts in guitar mechanics point out, true perfection is an illusion.
Even if you manage to get perfect intonation across the 12th fret on all strings, you may find that some areas of your fretboard still have poor intonation. It might surprise you to hear that guitars are imperfect instruments and perfect intonation is impossible on a standard guitar.
– Guitar Gear Finder, Ultimate Guide to Guitar Intonation
The goal is not impossible perfection, but the best possible compromise for your playing style. This is an essential, non-negotiable piece of instrument maintenance.
Eighth Notes on the Click: Learning to Play « In the Pocket »
Once your internal clock is stable, the next level of rhythmic mastery is learning to manipulate time on a micro-level. This is the essence of « groove » or playing « in the pocket. » It’s not about being perfectly on the mathematical center of the beat. It’s about the intentional and consistent placement of your notes slightly ahead of, directly on, or slightly behind the beat. This is what gives music its human feel, its forward momentum (playing ahead), or its relaxed, heavy feel (playing behind).
This is not a vague, mystical concept; it’s a measurable skill. As research on micro-timing perception demonstrates, the difference between a driving funk groove and a lazy blues shuffle can be a matter of just a few milliseconds in note placement relative to the beat. The metronome is your laboratory for experimenting with this. By setting it to click on the off-beats (the « ands » of the beat) or on beats 2 and 4 (imitating a snare drum), you force yourself to feel the space around the click, which is where the pocket lives.
To develop this feel, you must stop thinking of the click as just beats 1, 2, 3, 4. A powerful exercise is to set your metronome to half speed and perceive the clicks as beats 2 and 4, like a snare drum in a common rock or funk beat. You are now forced to supply beats 1 and 3 from your own internal pulse. This immediately shifts your focus from just « keeping time » to « creating a groove. » Start with simple quarter notes, ensuring your beat 1 is strong and confident. Then progress to eighth notes, feeling how they subdivide the space between the snare hits. This exercise fundamentally changes your relationship with the metronome from a rigid guide to a musical partner.
This is how you defeat the « robotic » sound. The robot plays exactly on the click. The musician plays *around* the click with intention. The metronome’s role is to provide the unwavering reference point against which your intentional pushes and pulls can be measured and refined.
Tuning by Ear Against a Drone: Developing Pitch Sensitivity
Relying solely on a visual tuner creates a dependency that keeps your ears dormant. A tuner screen tells you if you are sharp or flat, but it does not train your brain to *hear* it. The ultimate goal is for your ears to become the primary tuning device, with the electronic tuner serving only as an occasional calibration tool. The bridge between these two states is practice with a drone.
A drone is simply a continuous, sustained reference pitch. You can use a tone generator app or a specific drone tool. When you play a note on your instrument that is close to, but not exactly the same as, the drone’s pitch, you will hear a distinct acoustic phenomenon known as « beating. » This is a pulsating or wobbling sound (« wub-wub-wub ») that is the physical manifestation of the two slightly different sound waves interfering with each other. The faster the beating, the further apart the two pitches are. Your task is to adjust your instrument’s pitch until this beating slows down and, finally, disappears completely. When the beating stops, you are in perfect unison.
This practice is a direct workout for your brain’s pitch recognition centers. It is active, focused listening, not passive matching of a needle on a screen. Here is a fundamental training routine:
- Unison Training: Start a drone on a reference pitch (e.g., A4). Play the same note on your instrument. Close your eyes and focus only on the beating. Adjust your tuning peg with micro-movements until the wobble completely vanishes.
- Call and Response: Use an app that can play a random note. Listen to the drone, internalize the pitch, and then try to sing it back. Use a tuner app to check your vocal accuracy. This connects your ear to your voice, a crucial skill.
- Interval Training: This is the advanced step. Set the drone to a root note (e.g., C). Now, practice playing or singing other notes of the scale against it, like the major third (E). Listen for the « sweet spot » where the interval locks in and sounds pure and resonant. Out-of-tune intervals have a tense, ugly quality that is distinct from the beating of a unison.
This is not an easy or quick process. It is the patient, deliberate work of building true pitch sensitivity. It is what allows violinists to play in tune on a fretless instrument and vocalists to hold a harmony. It is the essence of musicianship.
The Mirror of Truth: Using Your Phone to Hear Reality
There is a harsh, unavoidable truth in music practice: while you are playing, your brain hears what you *intend* to play. Your focus is divided between the physical act of playing, reading music, and thinking about the next phrase. This creates a powerful perceptual filter. You simply do not hear all the subtle mistakes in timing, pitch, and dynamics that are actually occurring. The single most powerful, and often most painful, tool for breaking through this filter is the recording device. Your smartphone is a perfectly adequate, unforgiving mirror of truth.
Recording yourself and listening back with critical focus is not an act of vanity; it is an essential diagnostic process. The recording has no bias. It does not know what you intended to play. It captures only the cold, hard reality of the sound that came out of your instrument. This objective feedback is the fastest way to identify your true weaknesses. What felt like a fluid, groovy passage during performance might reveal itself as a rushed, uneven mess on playback. A note you thought was held with perfect vibrato might sound shaky and out of tune.
To avoid being overwhelmed by the feedback, you must listen with a structured approach. Do not just listen for a general « vibe. » Dissect your performance with the precision of a surgeon using the Three-Pass Listening Framework:
- First Pass (Rhythm Only): Listen to the recording with your attention focused exclusively on timing. Tap your foot to a metronome. Are you consistently ahead of the beat? Behind it? Does your tempo drift during difficult passages? Ignore all other aspects and just analyze your rhythmic accuracy.
- Second Pass (Pitch Only): Listen again, this time focusing only on intonation. Were there any sour notes? Did a bent note reach the correct pitch? Are the notes within a chord balanced and in tune with each other? Listen for any wavering or pitch instability.
- Third Pass (Musicality Only): On the final pass, listen for the emotional components. Were your dynamics (loud and soft) intentional and effective, or was the performance flat? Was your phrasing expressive? Did it convey the feeling you intended?
Take notes during this process as if you were your own (very strict) teacher. Identify specific measures or phrases that are weak, and then drill those specific spots. This is the cycle of deliberate practice: perform, diagnose, and correct. Your phone’s record button is the most important diagnostic tool you own.
432Hz Conspiracy: Should You Tune Lower for « Vibes »?
In your journey as a musician, you will inevitably encounter the persistent theory of A=432Hz tuning. Proponents claim this tuning standard is more « natural, » « healing, » or « mathematically in tune with the universe » compared to the modern standard of A=440Hz. From a pedagogical standpoint, this is a dangerous distraction from the real work of musicianship. Your focus should be on playing in tune with *a* standard, not debating the mystical properties of *which* standard.
The preference for lower tunings by many famous musicians is not based on cosmic vibrations; it is based on simple physics and practicality. Tuning an instrument down, whether to 432Hz or any other lower pitch like Eb standard (which many rock guitarists use), has a direct and measurable physical effect. It is not magic.
Case Study: The Physical Reality of Lower Tuning
When a guitar is tuned down from the standard A=440Hz, the immediate result is a reduction in string tension. This physical change has two main consequences. Sonically, looser strings produce a « warmer, » « darker, » and often « thicker » tone because they vibrate more freely with a stronger fundamental frequency and fewer bright overtones. Physically, the reduced tension makes the strings easier to press down and, most notably, easier to bend. For blues and rock guitarists who rely heavily on string bending, this enhanced playability is a significant advantage. It also can make singing easier for vocalists who are also playing, by lowering the overall key of a song. These are tangible, physical benefits, not metaphysical ones.
The overwhelming, non-negotiable reason to practice and perform using the A=440Hz standard is compatibility. It is the universal language of modern music. Pianos, orchestral instruments, virtual instruments in software, and 99.9% of all recordings you will ever play along with are tuned to A=440Hz. Choosing to tune to 432Hz is a choice to isolate yourself from the entire collaborative music world. You will be unable to play with other musicians without forcing everyone to re-tune to your esoteric standard. For a beginner, this is musical suicide. Master the standard first. Learn to play perfectly in tune with the world before you consider isolating yourself from it for a perceived « vibe. »
Key Takeaways
- Your perception is your primary instrument; the physical instrument is secondary.
- The tuner and metronome are non-negotiable diagnostic tools for calibrating your brain.
- Mastering these tools is about building internal skills (pitch sensitivity, internal clock), not creating a dependency.
Why You Can’t Play in Tune If You Don’t Know How to Listen
We arrive at the central, unavoidable thesis of this entire discussion: a high-end, perfectly set-up instrument in the hands of a musician who cannot actively listen will always sound amateurish. Conversely, a modest, well-maintained instrument played by someone with a trained ear will sound musical and convincing. The ultimate arbiter of your musical quality is not your gear; it is your ability to engage in active listening. This is not the same as passive hearing.
Passive hearing is what happens when sound washes over you. It’s background noise. Active listening is a focused, analytical skill that requires intense concentration and deliberate practice. It is the ability to deconstruct the sound you are hearing in real-time—to identify its rhythmic placement, its precise pitch relative to a tonal center, and its dynamic shape. For a musician, it is a predictive and corrective process. You hear the note in your head a microsecond before you play it, you execute the note, and you instantly analyze its accuracy and adjust the next one accordingly. This skill is why the use of aural training tools is so widespread among elite performers; adoption statistics reveal that over 1 million musicians, including students at top conservatories like Juilliard and professional Broadway performers, rely on active listening training tools daily.
This distinction is not philosophical; it is the most practical concept in all of music education. Understanding this difference is the final step in moving away from blaming your tools and toward taking full responsibility for your sound.
| Aspect | Passive Hearing | Active Listening |
|---|---|---|
| Definition | Sound washing over you without focused attention | Focused, analytical skill requiring concentration and practice |
| Musical Result | Reacting to what you’ve already played | Predicting and adjusting in real-time |
| Pitch Control | One-time tuning action, static | Continuous micro-adjustments with fingers, breath, or embouchure |
| Tool Purpose | Electronic tuner as permanent crutch | Tuner and drone as temporary training tools to calibrate ears |
| Instrument Dependency | Belief that an expensive instrument compensates for poor ears | Knowledge that a trained ear makes any well-maintained instrument sound musical |
As this comparison, informed by principles common in resources like those from leading music educators, makes clear, active listening is a skill you must build. It is what allows a vocalist to sing in tune, a violinist to find the right pitch on a fretless fingerboard, and a bassist to lock into a drummer’s groove. Your tuner and metronome are your personal trainers for this skill. They provide the objective feedback necessary to sharpen your perception until it becomes a reliable, precision instrument.
Stop making excuses and blaming your equipment. The path to real musicianship is not paved with expensive gear but with disciplined practice. Pick up your tuner, turn on your metronome, and begin the real work. Your future self will thank you.