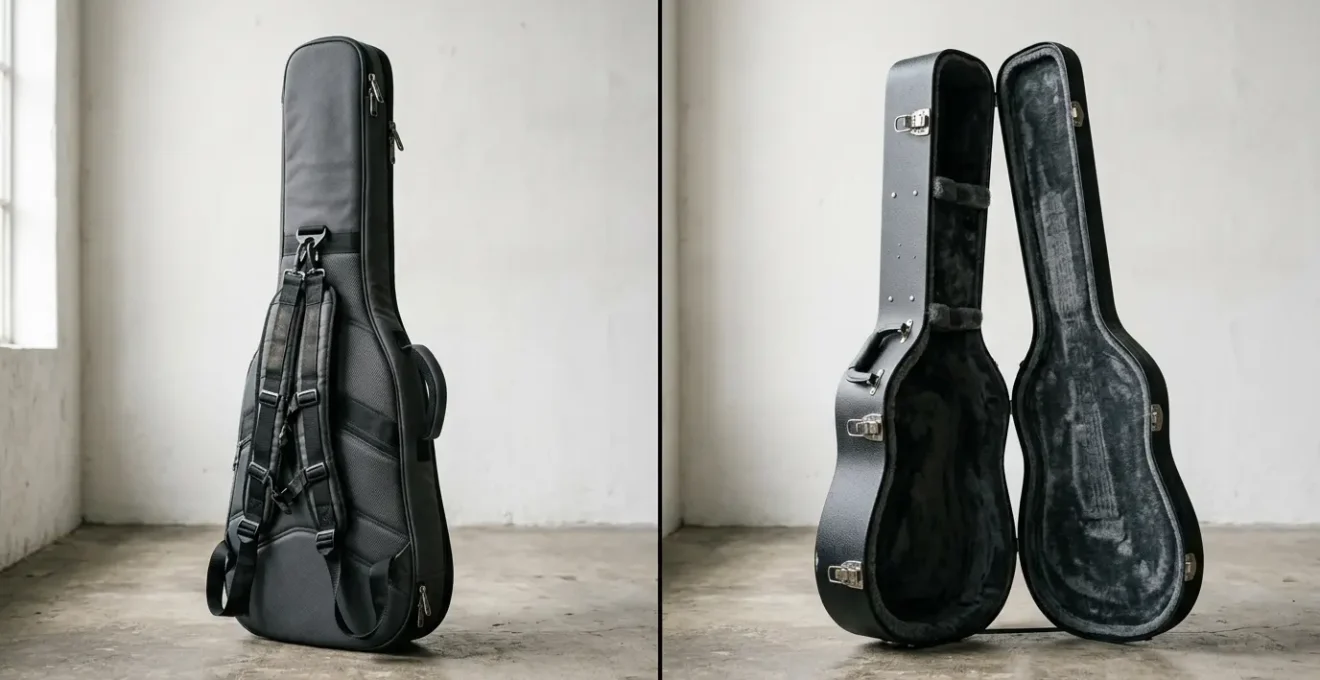
The best instrument case isn’t just about protection; it’s a vital tool that manages ergonomic load and prevents costly damage from non-obvious sources.
- Hard cases vary wildly: Plywood offers structural integrity while cheap chipboard provides minimal real-world protection from impacts.
- Your environment is a threat: Incompatible stand materials can melt nitro finishes, and poor humidity control can ruin an instrument from the inside out.
Recommendation: Match your case system (including stands and hangers) to your specific logistical needs—from daily commutes to air travel—to protect both your instrument and your long-term physical health.
Every musician on the move knows the dilemma. You’re standing by the door, instrument in hand, running the same tired calculation: the feather-light convenience of a gig bag versus the bomb-proof security of a hard case. The usual advice pits portability against protection, and leaves it at that. But if you’ve ever navigated a crowded subway, loaded a van in the rain, or felt that slow-burning ache in your shoulder after a long walk from the parking lot, you know the real story is far more complex. This isn’t just about surviving a fall; it’s about surviving the daily grind.
The truth is, your instrument case is the most critical component of your personal logistics system. It’s the interface between your prized possession and a world of concrete, tight corners, and fluctuating micro-climates. We often obsess over the instrument itself but overlook the ecosystem that keeps it safe and playable. This ecosystem includes not just the case, but the stands you use on stage, the hangers you use at home, and your awareness of hidden threats like chemical reactions and humidity imbalances. Thinking about your case as part of this larger system is the key to making a smart, durable choice that protects your investment and, just as importantly, your own body.
This guide moves beyond the simplistic pros and cons. We’ll break down the moments when only the toughest case will do, explore the hidden dangers of cheap accessories, and analyze how a well-designed case can be an ergonomic tool. By the end, you won’t just choose a case; you’ll build a strategy for keeping your instrument safe and your body healthy, no matter where the music takes you.
To navigate this complex topic, we’ve structured this guide to address the key decisions and hidden factors a working musician faces. From the rigors of air travel to the subtleties of material science, here is a comprehensive breakdown of what truly matters.
Summary: The Definitive Guide to Choosing Your Instrument’s Protection System
- Checking It In: When Do You Need an ATA Flight Case?
- Wire vs Solid Desk: Why Cheap Stands Drop Your Music
- Nitro Finish Warning: Stands That Melt Your Guitar’s Paint
- Carrying a Cello: Posture-Friendly Cases for Students
- Built-in Hygrometers: Do They Actually Work?
- Chipboard vs Plywood: Which Case Breath?
- Space Saving: Organizing 5 Guitars in the Space of 1
- Wall Hangers vs Cases: The Debate on Accessibility vs Protection
Checking It In: When Do You Need an ATA Flight Case?
Let’s start with the most extreme scenario: checking your instrument as baggage on an airplane. In this situation, a standard hard case or gig bag is not an option; it’s a gamble you will lose. This is the exclusive domain of the ATA-rated flight case. « ATA » refers to the Air Transport Association, and their specifications for reusable shipping containers are the benchmark for true durability. These cases are engineered systems designed to withstand the brutal reality of baggage handling, which involves automated conveyor belts, drops, and stacking under hundreds of pounds of other luggage.
The difference between a standard molded plastic case and a true flight case is immense. A flight case is built with a rugged exterior of ABS plastic laminated over plywood, reinforced with aluminum extrusions and steel ball corners. The foam inside is custom-cut to cradle the instrument, ensuring no movement during impacts. The standards are rigorous; a Category I container must be able to survive a minimum of 100 round trips by air, according to the ATA 300 specification. The testing process involves a brutal series of drops—160 face drops from 30 inches and 40 corner drops from 36 inches for a case under 50 pounds—plus vibration and water resistance tests. This is far beyond what any gig bag or consumer-grade hard case is designed for.
So, when do you need one? The answer is simple: you need an ATA flight case the moment the instrument leaves your physical possession and is handed over to a third party for transport, whether it’s an airline, a shipping company, or a road crew. If it’s going in the cargo hold, it needs to be in a case that assumes the worst will happen. For van tours where you control the packing, or for daily commutes, it’s overkill. But for professional touring musicians who fly, it’s not a luxury—it’s a non-negotiable cost of doing business.
Wire vs Solid Desk: Why Cheap Stands Drop Your Music
Your instrument’s safety doesn’t end when it’s out of the case. One of the most vulnerable moments for any musician’s gear is when it’s resting on a stand, whether on a dimly lit stage or in a busy practice room. The market is flooded with cheap, flimsy wire music stands that fold down to nothing, but their convenience comes at a steep price: stability. The fundamental flaw of most wire stands is their high center of gravity combined with a narrow, unstable base. The legs are often thin metal rods that can easily bend, and the desk itself is a skeletonized frame that provides minimal support for a heavy binder of sheet music.
All it takes is a slight bump from a bandmate, a gust of wind at an outdoor gig, or the weight of a binder shifting, and the entire setup can topple over. When a heavy music stand falls, it rarely falls gracefully away from your instrument. Its trajectory is often directly onto the face of your guitar, the keys of your synth, or the bell of your horn. This is how you get deep gouges, cracked finishes, and broken headstocks—not from a dramatic transport accident, but from a five-dollar accessory failure. The risk is simply not worth the marginal savings in cost or space.
A solid-desk stand, by contrast, is designed for stability. Look for models with a tripod base that has a wide footprint. The legs should be made of tubular steel, not thin rods, and the height adjustment collars should be robust. The desk itself, whether solid or perforated metal, provides a low, stable center of gravity for your music. It’s designed to hold a heavy book without tipping. While it may be heavier and bulkier, it’s an essential piece of your protection ecosystem. Your choice of stand is a direct reflection of how much you value the instrument sitting next to it. Saving a few dollars on a stand that puts your thousand-dollar instrument at risk is a poor logistical decision.
Nitro Finish Warning: Stands That Melt Your Guitar’s Paint
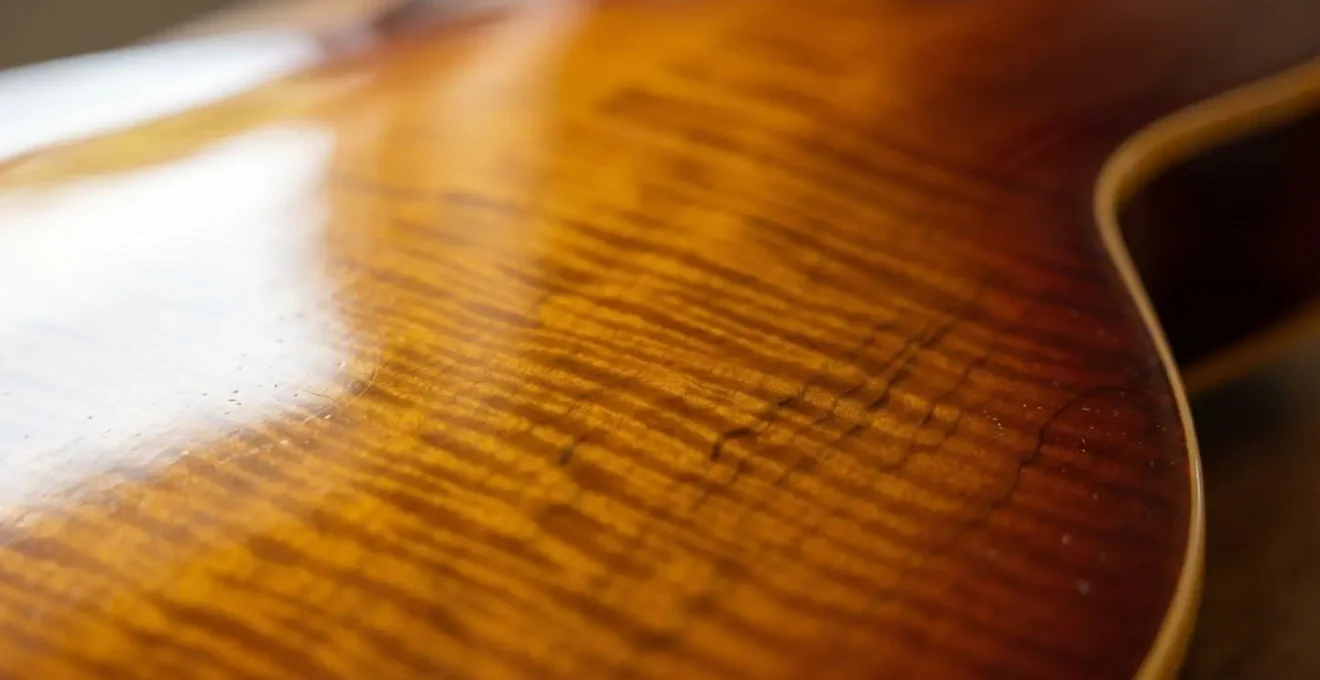
Beyond the immediate, physical threat of a stand falling over lies a more insidious danger: chemical incompatibility. This is a critical issue for owners of vintage or high-end guitars, particularly those from brands like Gibson and Fender, which have historically used nitrocellulose lacquer finishes. « Nitro » is a prized finish for its thinness, its ability to age beautifully, and its supposed tonal benefits. However, it has a significant vulnerability: it remains chemically active for its entire life and can react adversely with certain synthetic materials.
Many common instrument stands, wall hangers, and case interiors use padding made from synthetic foam, vinyl, or rubber. These materials can contain plasticizers that leach out over time. When a nitrocellulose-finished guitar is left in direct, prolonged contact with this type of material, a chemical reaction can occur. The lacquer softens, becomes sticky, and can appear to « melt. » In the worst cases, the finish can permanently fuse to the stand’s padding, pulling away from the wood when the guitar is removed. This damage is not a simple stain; it is a permanent destruction of the finish that requires costly, expert-level repair work.
How do you avoid this? First, know your instrument’s finish. If you’re unsure, assume it’s nitrocellulose, especially if it’s a vintage-style American guitar. Second, be vigilant about your accessories. Look for stands and hangers that are explicitly marketed as « nitro-safe. » These typically use inert materials like natural felt, untreated cotton, or specialized microfibers. As a simple, effective precaution, you can cover the contact points of any suspect stand with a strip of 100% cotton cloth (like from an old t-shirt). It’s a low-tech solution to a high-tech problem, proving that protecting your gear is as much about material science as it is about avoiding drops.
Carrying a Cello: Posture-Friendly Cases for Students
For players of large, unwieldy instruments like the cello, the concept of a case moves beyond simple protection and into the realm of ergonomics and personal health. A standard cello case, carried by a single shoulder strap or a side handle, creates a significant and uneven load on the body. For a student commuting on public transport or walking to school, this asymmetric load can lead to poor posture, muscle strain, and even long-term back and shoulder problems. The sheer logistical footprint of a cello case makes it a constant obstacle, and carrying it improperly adds a layer of physical stress that can detract from the joy of playing.
This is where case design becomes a critical factor in a musician’s well-being. The focus shifts from the case’s weight to the concept of ergonomic load distribution. A posture-friendly case system is designed to carry the instrument’s weight as efficiently and safely as a technical hiking backpack. This means moving beyond a single strap and embracing a full backpack-style harness. A good ergonomic system will feature two padded shoulder straps, a sternum (or chest) strap to prevent the shoulder straps from slipping outward, and, most importantly, a padded hip belt. The hip belt is crucial because it transfers the majority of the case’s weight from the fragile shoulder muscles to the powerful pelvic girdle, which is designed to bear heavy loads.
This isn’t just a theoretical improvement; it’s a practical solution that transforms the experience of transporting a large instrument. It allows the musician to stand upright, keep their hands free, and navigate crowded spaces with greater ease and safety. The case becomes less of a burden and more of an integrated part of their movement.
Case Study: The BAM Ergonomic Backpack System
To solve this exact problem, the case manufacturer BAM developed an add-on that transforms a standard case. As detailed in a product analysis by specialists like Linda West Cellos, the BAM Ergonomic Backpack System is a harness that attaches to cases with a single D-ring. It incorporates features from high-end outdoor gear, including a chest strap for stability, load lifters to pull the weight closer to the user’s back, and a crucial belt strap to transfer the load to the hips. This system allows a cellist to carry their instrument with the same ergonomic principles used by long-distance hikers, significantly reducing fatigue and the risk of posture-related injury.
Built-in Hygrometers: Do They Actually Work?
Many hard cases, especially for acoustic instruments, come with a built-in hygrometer as a selling point. This small dial, promising a real-time reading of the relative humidity inside the case, seems like a fantastic feature. After all, maintaining a stable humidity level (typically between 45-55%) is critical for preventing the wood of an acoustic guitar, violin, or cello from drying out, cracking, or swelling. The problem is that the vast majority of these inexpensive, factory-installed analog hygrometers are notoriously inaccurate. They are often novelty items rather than scientific instruments, and trusting one can be more dangerous than not having one at all.
An inaccurate hygrometer might read 50% when the actual humidity is a dangerously low 30%, giving you a false sense of security while your instrument is slowly being damaged. These built-in units are rarely calibrated at the factory and are susceptible to drift and malfunction. The good news is that you don’t have to guess. You can, and should, verify the accuracy of any hygrometer, whether it’s built-in or a separate digital unit you’ve purchased.
A reliable and simple way to check your hygrometer’s calibration is the « salt test. » This method uses a quirk of chemistry: a saturated solution of salt and water will reliably produce a relative humidity of exactly 75% in a sealed environment. By placing your hygrometer in a sealed bag with some damp salt and leaving it for several hours, you can see how accurate it is. If it reads 65% after the test, you know it reads 10 points low. You can then apply this offset to all future readings. To maintain this accuracy, experts recommend calibrating humidity sensors at least once a year. A calibrated digital hygrometer, which you can buy for a modest price and place inside your case, is an infinitely more reliable tool for managing your instrument’s micro-climate than the decorative dial that came with the case.
Here’s a simple, step-by-step guide to performing the salt test:
- Place a small amount of table salt (about a tablespoon) into a bottle cap or small dish.
- Add a few drops of water—just enough to make the salt damp like wet sand, not to dissolve it into a puddle.
- Place the salt cap and your hygrometer inside a clear, sealable plastic bag (like a zip-top bag).
- Seal the bag, trapping some air inside. Leave it at a stable room temperature for at least 6 to 8 hours.
- Without opening the bag, read the hygrometer. It should read exactly 75%. The difference between the reading and 75% is your hygrometer’s margin of error.
Chipboard vs Plywood: Which Case Breath?
Not all hard cases are created equal. From a distance, two black hardshell cases might look identical, but their protective capabilities can be worlds apart. The crucial difference often lies in the core material of the shell, a choice that dramatically impacts the case’s structural integrity, weight, and price. The two most common materials for traditional wood cases are chipboard and plywood.
Chipboard, also known as particle board, is the material used in the vast majority of cheap, entry-level hard cases—the kind often included for free with a new instrument. As a touring musician and logistics expert, I can tell you these are barely a step up from a gig bag in a serious impact scenario. Chipboard is essentially sawdust and wood chips compressed with resin. It’s heavy for its strength and has very poor impact resistance. It cracks, crumbles, and offers little structural rigidity. It provides decent protection against scratches and light rain, but it will not reliably save your instrument from a serious fall or a crushing force in the back of a van.
As the experts at Seymour Duncan bluntly put it in their analysis of case types:
They are made of chipboard, or sawdust compressed into sheets and covered with a thin plastic coating. These cases have little to no padding, and even if they did, they only protect a guitar from a light sprinkle of rain or normal dust.
– Seymour Duncan, Cage Match: Gig Bags Vs. Hard Cases
Plywood, on the other hand, is an engineered wood product made from multiple thin layers (or « plies ») of wood veneer glued together with their grains at right angles. This cross-graining creates a material with exceptional strength-to-weight ratio and resistance to cracking and splitting. A case made from 3-ply or 5-ply plywood provides a genuine structural shell around the instrument. It can absorb and distribute the force of a significant impact, keeping the instrument safe inside. This is the same material principle used in high-quality flight cases. While a plywood case is more expensive and can be heavier than a molded plastic case, it provides a level of dependable, structural protection that chipboard simply cannot match. When you pay for a premium hard case, you are often paying for the superior material science of multi-ply plywood.

Space Saving: Organizing 5 Guitars in the Space of 1
For many musicians, especially those touring in a van or living in a small apartment, the problem isn’t just protecting one instrument—it’s managing several. A collection of individual hard cases has a massive logistical footprint. They are bulky, they don’t stack securely, and they quickly consume all available floor and closet space. Trying to pull one specific guitar from a pile of five identical black rectangles is a frustrating and potentially damaging exercise. This is where strategic storage solutions become as important as the cases themselves.
The goal is to maximize density while maintaining accessibility and safety. For this, multi-guitar stands and racks are indispensable. The most common solution is a « boat » or A-frame rack that can hold anywhere from 3 to 7 guitars side-by-side. These are great for keeping instruments accessible in a studio or practice space, significantly reducing the floor space required compared to individual stands. However, for a touring van, where things can shift dramatically, a more secure option is a « tree » style stand. These stands have yokes that securely hold each guitar by its headstock and a body rest at the base, preventing them from knocking against each other.
For the ultimate in space efficiency and security, especially in a moving vehicle, a rack case is the professional solution. These are essentially flight cases designed to hold multiple guitars in a vertical, slot-in configuration, often on a rolling base. They offer the density of a rack with the protection of a hard case. While a significant investment, they solve the problem of both storage and transport in one go. The key principle is to think vertically and in multiples. By moving away from the idea that every instrument needs its own patch of floor, you can create an organized, space-efficient, and safe system for your entire collection, transforming a chaotic pile into a well-managed arsenal.
Key takeaways
- A true ATA flight case is the only safe option for air travel when checking an instrument.
- The materials of your stands and hangers matter; cheap foam can chemically damage a nitrocellulose finish.
- An ergonomic case with a proper backpack harness can prevent chronic injury when carrying heavy instruments.
Wall Hangers vs Cases: The Debate on Accessibility vs Protection
The final piece of the protection puzzle concerns your home base. Here, the debate shifts from mobility to the trade-off between instant accessibility and long-term protection. On one side, you have wall hangers, which keep your instruments visible, accessible, and ready to be played at a moment’s inspiration. On the other, you have cases, which keep them protected from dust, accidents, and environmental changes, but add a barrier—however small—to picking it up and playing.
For a gigging musician, this choice reflects two different mindsets. The gig bag or hard case is part of the « on the go » system, a tool for the logistical challenge of moving gear. One contributor for Seymour Duncan perfectly captured this feeling, stating, « The gig bag is my preferred mode of guitar transport… I can keep the guitar with me the whole time, which keeps the anxiety level low when travelling. » This highlights the case as a tool for peace of mind in unpredictable environments.
Wall hangers, conversely, are for the trusted environment of your home or studio. They are an excellent solution for encouraging practice by removing the friction of unzipping a bag or unlatching a case. However, this accessibility comes with risks: exposure to dust, accidental bumps in high-traffic areas, and, most importantly, the danger of an improper installation. A hanger that is not securely mounted into a wall stud or anchored correctly in drywall is a catastrophic failure waiting to happen. The installation is everything.
Action Plan: Safe Wall Hanger Installation Checklist
- Locate structural support: Use a stud finder to locate a wooden wall stud. This is the most secure mounting point. Mark its center.
- Select appropriate hardware: If a stud is not available, use heavy-duty toggle bolts or drywall anchors specifically rated to hold at least double your instrument’s weight. Do not use standard plastic anchors.
- Verify material safety: Check that the hanger’s padding is certified as « nitro-safe » if you have instruments with nitrocellulose lacquer finishes to prevent chemical reactions.
- Choose a safe location: Install the hanger on an interior wall, away from direct sunlight, heating or cooling vents, and doorways to avoid temperature shocks and accidental impacts.
- Test the installation: Before hanging your precious instrument, pull down firmly on the installed hanger to ensure it is completely secure and does not move.
Ultimately, the best solution is often a hybrid one. Use wall hangers for the one or two instruments you play daily, ensuring they are installed with meticulous care. Keep the rest of your collection, especially valuable or climate-sensitive instruments, safe in their cases with proper humidification. This approach gives you the best of both worlds: the inspiration of accessibility and the peace of mind of robust protection. After considering all options, it is always wise to weigh them against the gold standard of security.